

『Fischer Porter Magnetic Flow Meter Manual: Wiring Diagrams for Copa-X Transmitters』Related information(clamp on meter|electromagnetic meter|venturi meterrotameter|orifice meter|ultrasonic flow meter|mass flow meter|coriolis mass flow meter|coriolis flow meter|magnetic flow meter|magmeter flow meter|magflow flow meter|mag meter flow meter|electromagnetic flow meter|vortex flow meter|turbine flow meter|thermal mass flow meter|thermal flow meter|rotameter flow meter)

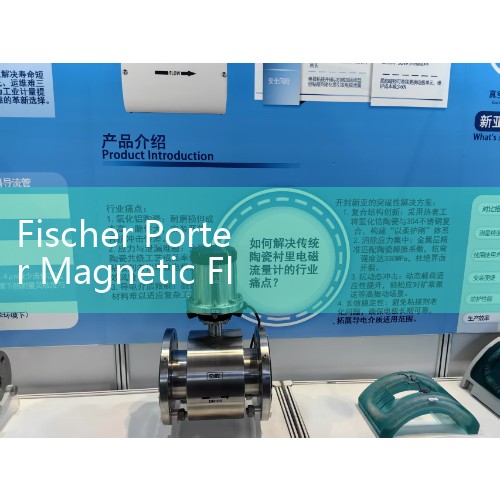
Fischer Porter Magnetic Flow Meter Manual: Wiring Diagrams for Copa-X Transmitters and Replacement Notes
Quick Answer: The Copa-X wiring diagrams split the connections into power supply, 4-20 mA output, pulse output, and flow sensor coil circuits. You need the exact terminal ID from the nameplate or cover label before you connect field cables. Silver Instruments supplies electromagnetic flow meters for most Copa-X DN15 to DN600 installations with matching flange and liner options.
Why Engineers Search for the Copa-X Wiring Diagram
Fischer Porter Copa-X transmitters are still running in water plants, chemical skids, and food processing lines. Many maintenance teams lose the original paper manual. The terminal labels on the transmitter also fade after years in humid or outdoor installations. This is the main reason engineers search for the Copa-X wiring diagram before a shutdown or loop check.
In practice, the wiring layout is simple. The original manual usually shows separate drawings for AC power, DC power, analog output, and pulse output. Most field failures come from wrong supply voltage or reversed signal polarity. That is why the nameplate photo matters before you wire anything.
Typical Copa-X Terminal Sections
Different Copa-X versions use slightly different terminal numbers. Most units follow the same function groups. Check the cover label first. If the label is gone, use these groups as a guide.
- Power supply: AC terminals often marked L, N, PE. DC versions use + and - with a ground terminal. Supply can be 110 V AC, 220 V AC, or 24 V DC depending on the model.
- 4-20 mA output: Terminals are usually marked I+ and I- or 31 and 32. Use a shielded twisted pair cable with a loop power supply.
- Pulse or frequency output: Terminals may be P+ and P- or passive open collector contacts. Do not connect this output directly to AC voltage.
- Flow sensor coils: These wires go to the magnetic coils inside the flow tube. They are often marked X and Y or M1 and M2. Do not reverse them.
- Electrodes and ground: Electrode wiring may be E1 and E2. Some sensors have an internal ground. Others need ground rings or grounding electrodes.
Here is the thing. Most engineers skip the coil and electrode section until the meter reads zero or unstable. But a loose electrode wire can cause the same symptom as an empty pipe.
Field Checks Before You Wire a Copa-X Transmitter
First confirm the supply voltage from the transmitter nameplate. Then remove the cover and compare the terminal labels with the manual drawing. If the drawing is missing, take a clear photo of the terminal block before you disconnect anything.
For the 4-20 mA signal use at least 0.75 mm squared screened twisted pair cable. Keep signal cable at least 300 mm away from AC power cables. But do not run signal and power in the same conduit. This rule also applies to Silver Instruments replacement meters.
Ground the sensor properly. Metal pipes need a ground connection to the flow tube body. Plastic or lined pipes need grounding rings or grounding electrodes. A paint manufacturer in Southeast Asia replaced an old Copa-X after a new pump added electrical noise. The grounded electrode option solved the unstable reading on the replacement meter.
Common Copa-X Field Failures
Dead display is often a power supply problem. Check t
A 4-20 mA output stuck at 4 mA or 20 mA may be a wiring fault or a wrong loop load. Measure the DC voltage at the transmitter output terminals. You need at least 18 V DC at the terminal under loop load. If the voltage is lower, check the PLC analog card and the loop resistance.
Unstable flow readings often come from air inside the pipe, low fluid conductivity below 5 µS/cm, coating on the electrodes, or a missing ground. Do not assume the transmitter is bad before you check the process conditions.
Silver Instruments Replacement for Old Copa-X Meters
We supply electromagnetic flow meters for clean water, wastewater, chemicals, food, and marine fluid lines. The meter series covers DN10 to DN2000 with hard rubber, PTFE, and PFA liners. Electrode materials include 316L stainless steel, Hastelloy C, titanium, and tantalum.
For most Copa-X replacements we match the flange standard, pipe size, liner, and electrode material. Standard outputs are 4-20 mA with HART, pulse, and RS485 Modbus. Power can be 85 to 265 V AC or 24 V DC. Pressure ratings are typically PN16 or PN40, with ANSI 150 or 300 as options. Fluid temperature can be up to 80 degrees Celsius with hard rubber or 120 degrees Celsius with PTFE. Higher temperature designs are available for special process conditions.
A water treatment plant in Malaysia replaced two old Copa-X DN150 meters with Silver Instruments electromagnetic flow meters after the original terminal labels became unreadable. We used the same DN150 flanges and PTFE liner. The plant sent us photos of the old spools and the flow range. We confirmed the order in two days.
How to Request a Copa-X Replacement Quote
Send us the pipe size in DN, fluid name, flow range in m3/h or L/h, pressure, temperature, power supply, and flange standard. A photo of the old Copa-X nameplate helps a lot. Also tell us the liner and electrode material if you know them. We will reply with a replacement recommendation and price.
Contact Silver Automation Instruments at Tel: +86-25-68650347. WhatsApp: +86-25-52155837. WeChat: +86 15365082610. Website: flow-meter.com.au.
FAQ
What power supply does the Copa-X transmitter use?
Many Copa-X transmitters run on 110 V AC or 220 V AC. Some later versions accept 24 V DC. Check the nameplate before connecting power.
Where can I find the original Fischer Porter Copa-X wiring diagram?
The original manual has the wiring diagram in the installation section. If the terminal label is gone, use the terminal number on the board. Silver Instruments can help identify it from a clear photo.
Can I connect a Copa-X 4-20 mA output directly to a PLC?
Yes. Use shielded twisted pair cable and a loop power supply. Confirm the PLC analog input is set for 4-20 mA and the loop load is correct.
What flow meter can replace an old Copa-X without changing the pipe?
Silver Instruments supplies an electromagnetic flow meter in the same DN size with matching flange standard. We also match liner and electrode material for the fluid.
Does Silver Instruments supply manuals and wiring diagrams for replacements?
Yes. Every replacement meter ships with a wiring diagram, terminal drawing, installation manual, and calibration report.
 Hot Product
 Related AD